Google Analytics can provide you with a wealth of information about your website without any customization but in order to fully understand your website performance, you have to make some changes. One simple way to do this is by creating custom goals to track conversion actions users can take on your website.
What is a conversion?
A conversion can be very different from company to company or even visitor to visitor. Deciding what to define as a conversion is a crucial step in the process of setting up conversions.
In this post, we will walk you through the steps necessary to create these conversions.
When it comes to deciding what to count as a “conversion”, here are few examples of popular on-site actions many companies keep track of:
- Purchase
- Newsletter sign-up
- Contact information submission
- Specific page(s) visited
- Duration of website visit
This article explains how to create a goal in Google Analytics. If you don’t already have a Google Analytics account, you can create one here (analytics.google.com).
Once you’ve setup your account and are logged in, follow these steps:
Create a New Goal
First, select the Admin button in the lower left corner of the screen.
This will take you to a page with three options: Account, Property and View. Select the view you want to create the goal in.
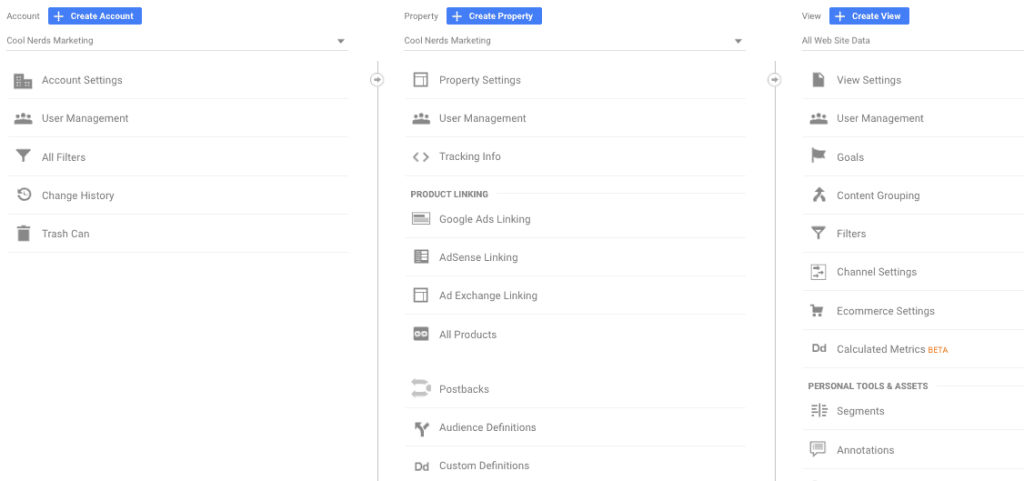
Once in the View column, select Goals.
![]()
Once there, click the red + New Goal button.
![]()
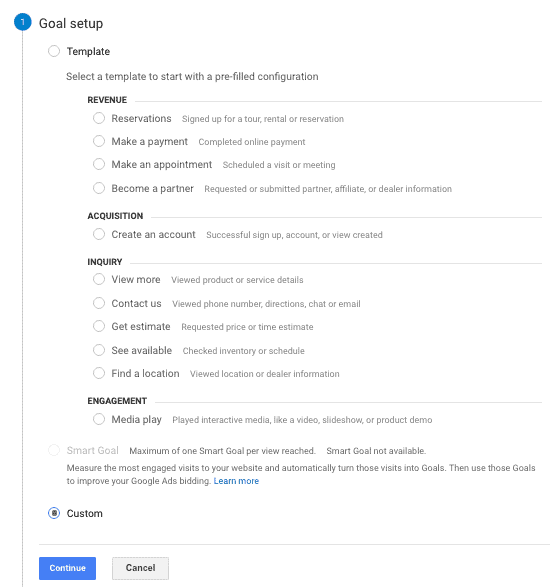
Next, choose the type of Goal you want to setup
In this example, we will be creating a goal that will track contact form submissions by sending a conversion to Google Analytics (which can later be imported into Google Ads) by tracking the URL of the page a user is directed to once the form is submitted.
Tip: It is a good idea to have a custom “Thank you” page for each form on your website so you can better track which forms are performing best.
Under Goal setup, select the Custom button and click Continue.
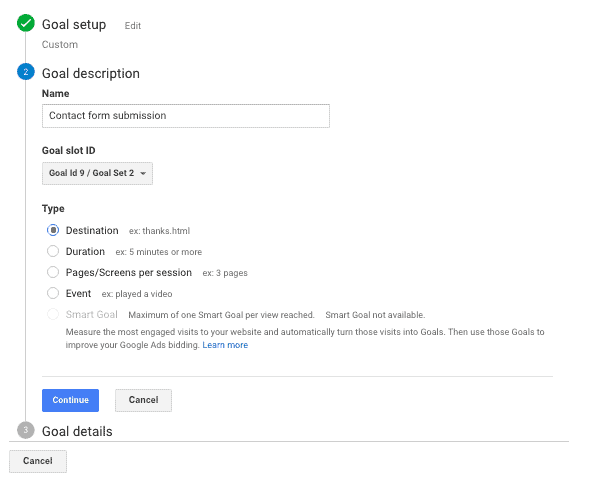
Enter Goal Description
You’ll be asked to name the goal and choose the type. Enter any name that will help you to remember the conversion you are tracking and be mindful that you may be adding several goals over time. Select Destination as the type then click Continue.
Enter Goal Details
You will then need to enter the unique string for the URL for your thank you page.
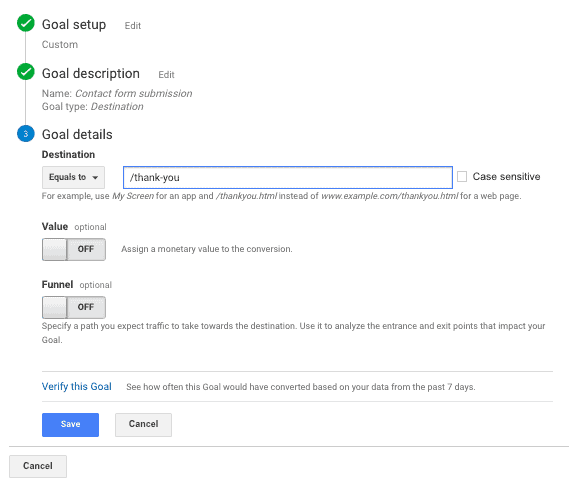
You will have the option to assign a specific Value to the goal. This is helpful if you have a value for each contact form submission. Perhaps a CLTV but you have to be careful and factor n your close/conversion rates.
The Funnel option is usually used if you are tracking a conversion that happens after a specific process of steps a user goes through to complete the conversion action (think a sale on an e-commerce site with a multi-step checkout process).
Once everything is filled in, click the Save button.
Congratulations! Your goal is created and you now have nothing more to do than wait for conversions to start rolling in.
There are several ways to analyze the data. One of the most important reports to view on a regular basis is the Acquisition > All Traffic > Source/Medium report.
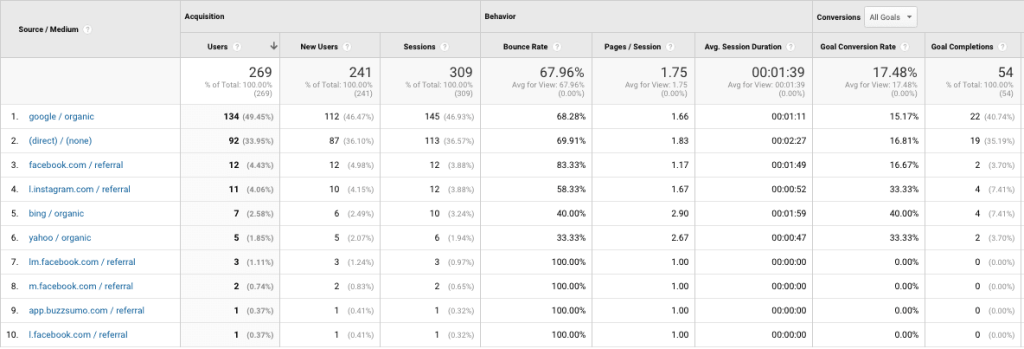
This will allow you to see which sources have the highest conversion rates and which need attention.
Having trouble setting up conversions in Google Analytics? You can contact us for help!